A free-body diagram is a graphical representation of the forces acting on an object in a given situation. It can help us analyze the motion and equilibrium of the object, as well as the interactions with other bodies. Here is a brief guide on how to draw free-body diagrams in approximately 1000 words:
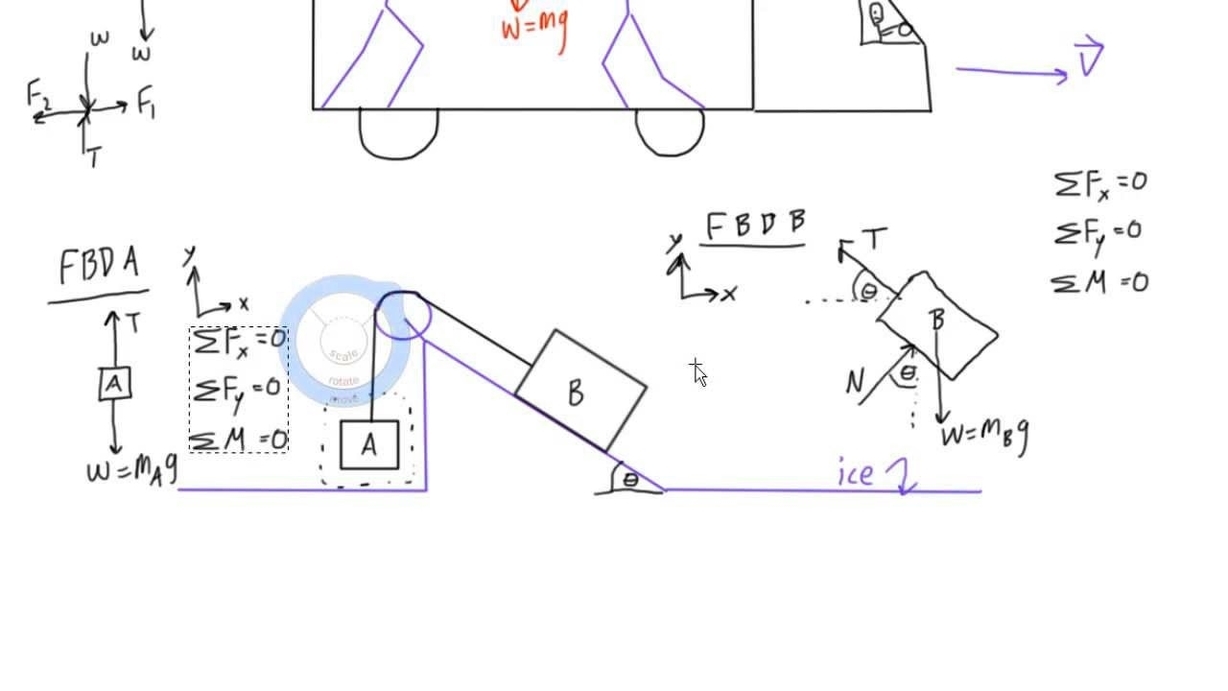
1. Sketch the situation. Draw a simple picture of the object and its surroundings, and identify the relevant forces that act on it. For example, if the object is a car on a slope, you might draw the car, the slope, the ground, and the forces of gravity, normal, friction, and tension (if there is a rope attached to the car).
2. Isolate the object. Draw a dot or a box to represent the object, and erase everything else. This is the free-body diagram of the object, and it shows only the forces that act directly on it. Do not include forces that act on other bodies, or forces that the object exerts on other bodies. For example, if the object is a car on a slope, you would erase the slope, the ground, and the rope, and only keep the dot or the box for the car.
3. Draw and label the forces. Draw arrows from the dot or the box to show the direction and magnitude of each force. The length of the arrow should be proportional to the strength of the force. Label each arrow with the type and symbol of the force, such as F_g for gravity, F_N for normal, F_f for friction, and F_T for tension. Use subscripts to indicate which bodies are involved in the force, such as F_N,car for