See the below image for the Crab origami instructions diagram.

Charts, Graphs and Diagrams
See the below image for the Crab origami instructions diagram.
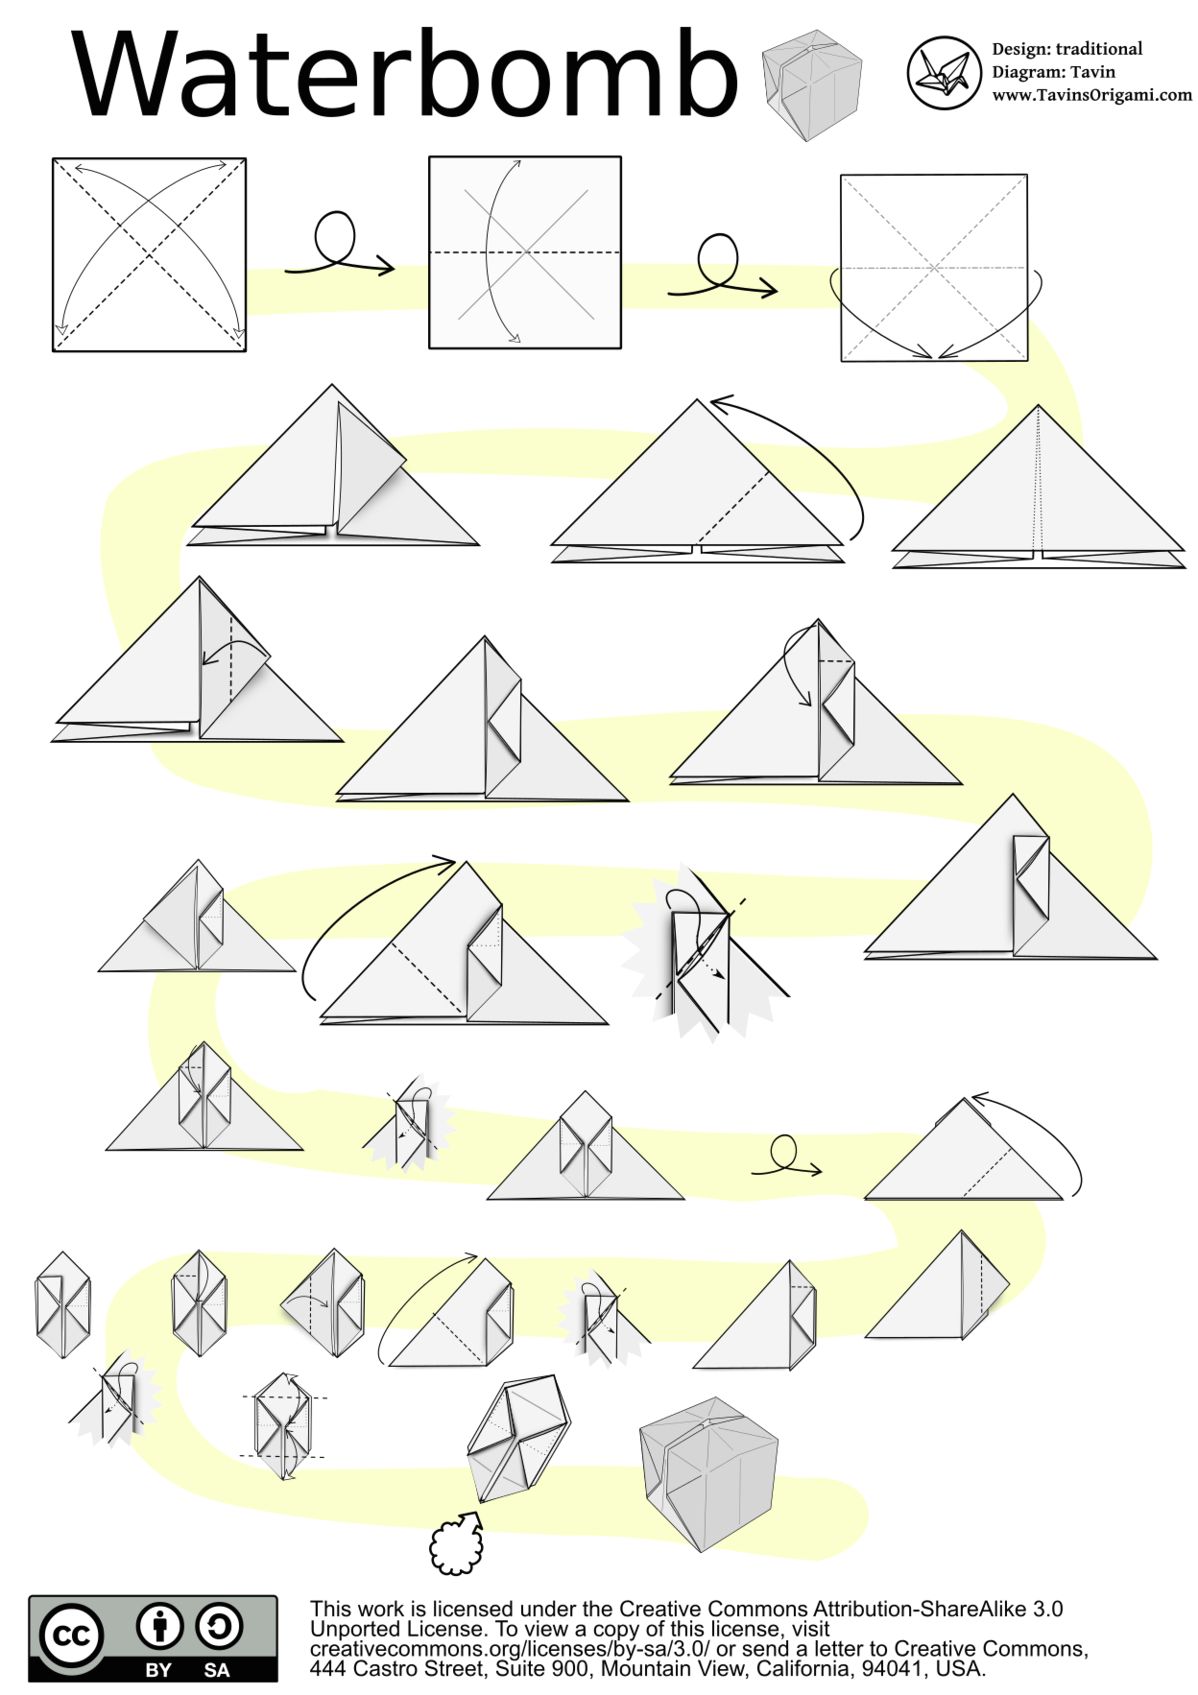
See the below image for the Origami waterbomb instructions diagram.
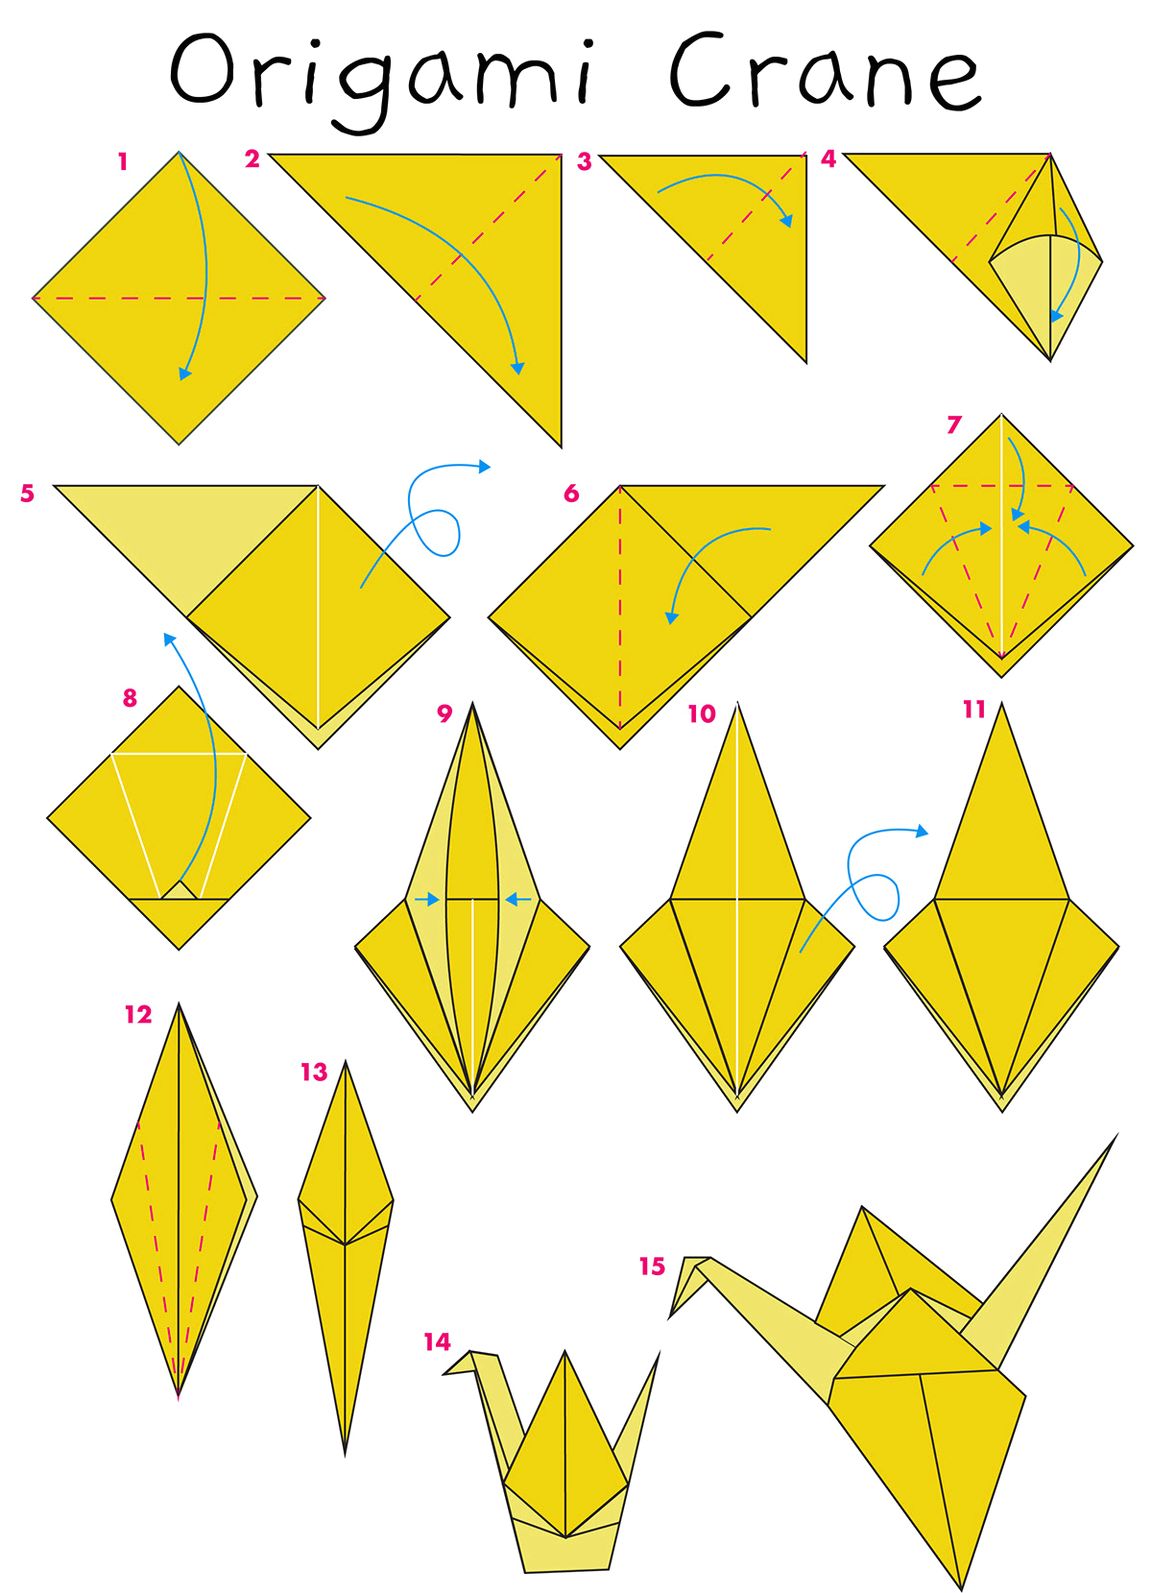
See the below image for the Crane origami diagram.
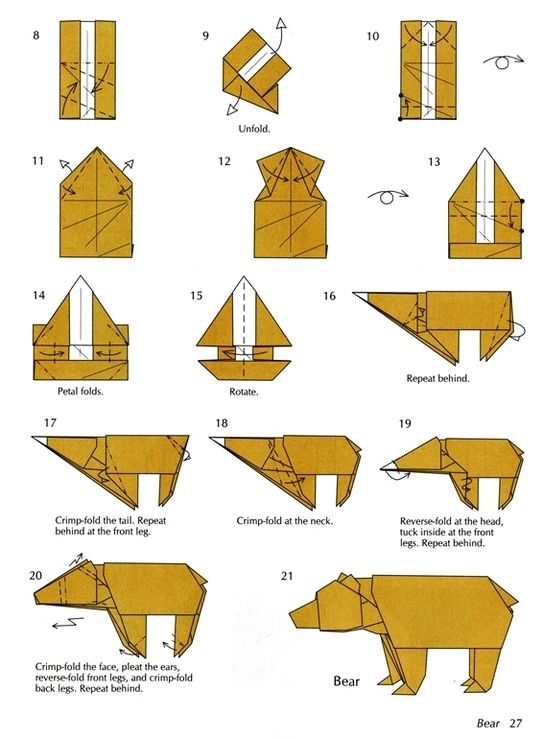
See the below image for the Bear origami diagram. I see a simple origami bear looking at me! There are so many great children’s books that involve bears – Goldilocks & The Three Bears; The Very Cranky Bear; We’re Going On A Bear Hunt; The Very Itchy Bear; The Bear Snores On; The Berenstain Bears etc. So here is a great craft to try with the kids that doesn’t involve too many materials.
Take a piece of square origami paper (4X4inch). Place the paper diagonally in front of you. Fold the paper in half diagonally to create a triangular shape. Now take the middle point of the triangle and bring the top point to the triangle’s long length. Now take the left point of the triangle and bring it towards the bottom edge.
You will also need some origami paper, colorful paper, glue, scissors, a ruler, a pencil, and some markers. After you print out the template and make your corner bookmark base using the step-by-step directions above, you are ready to cut out your bear pieces.
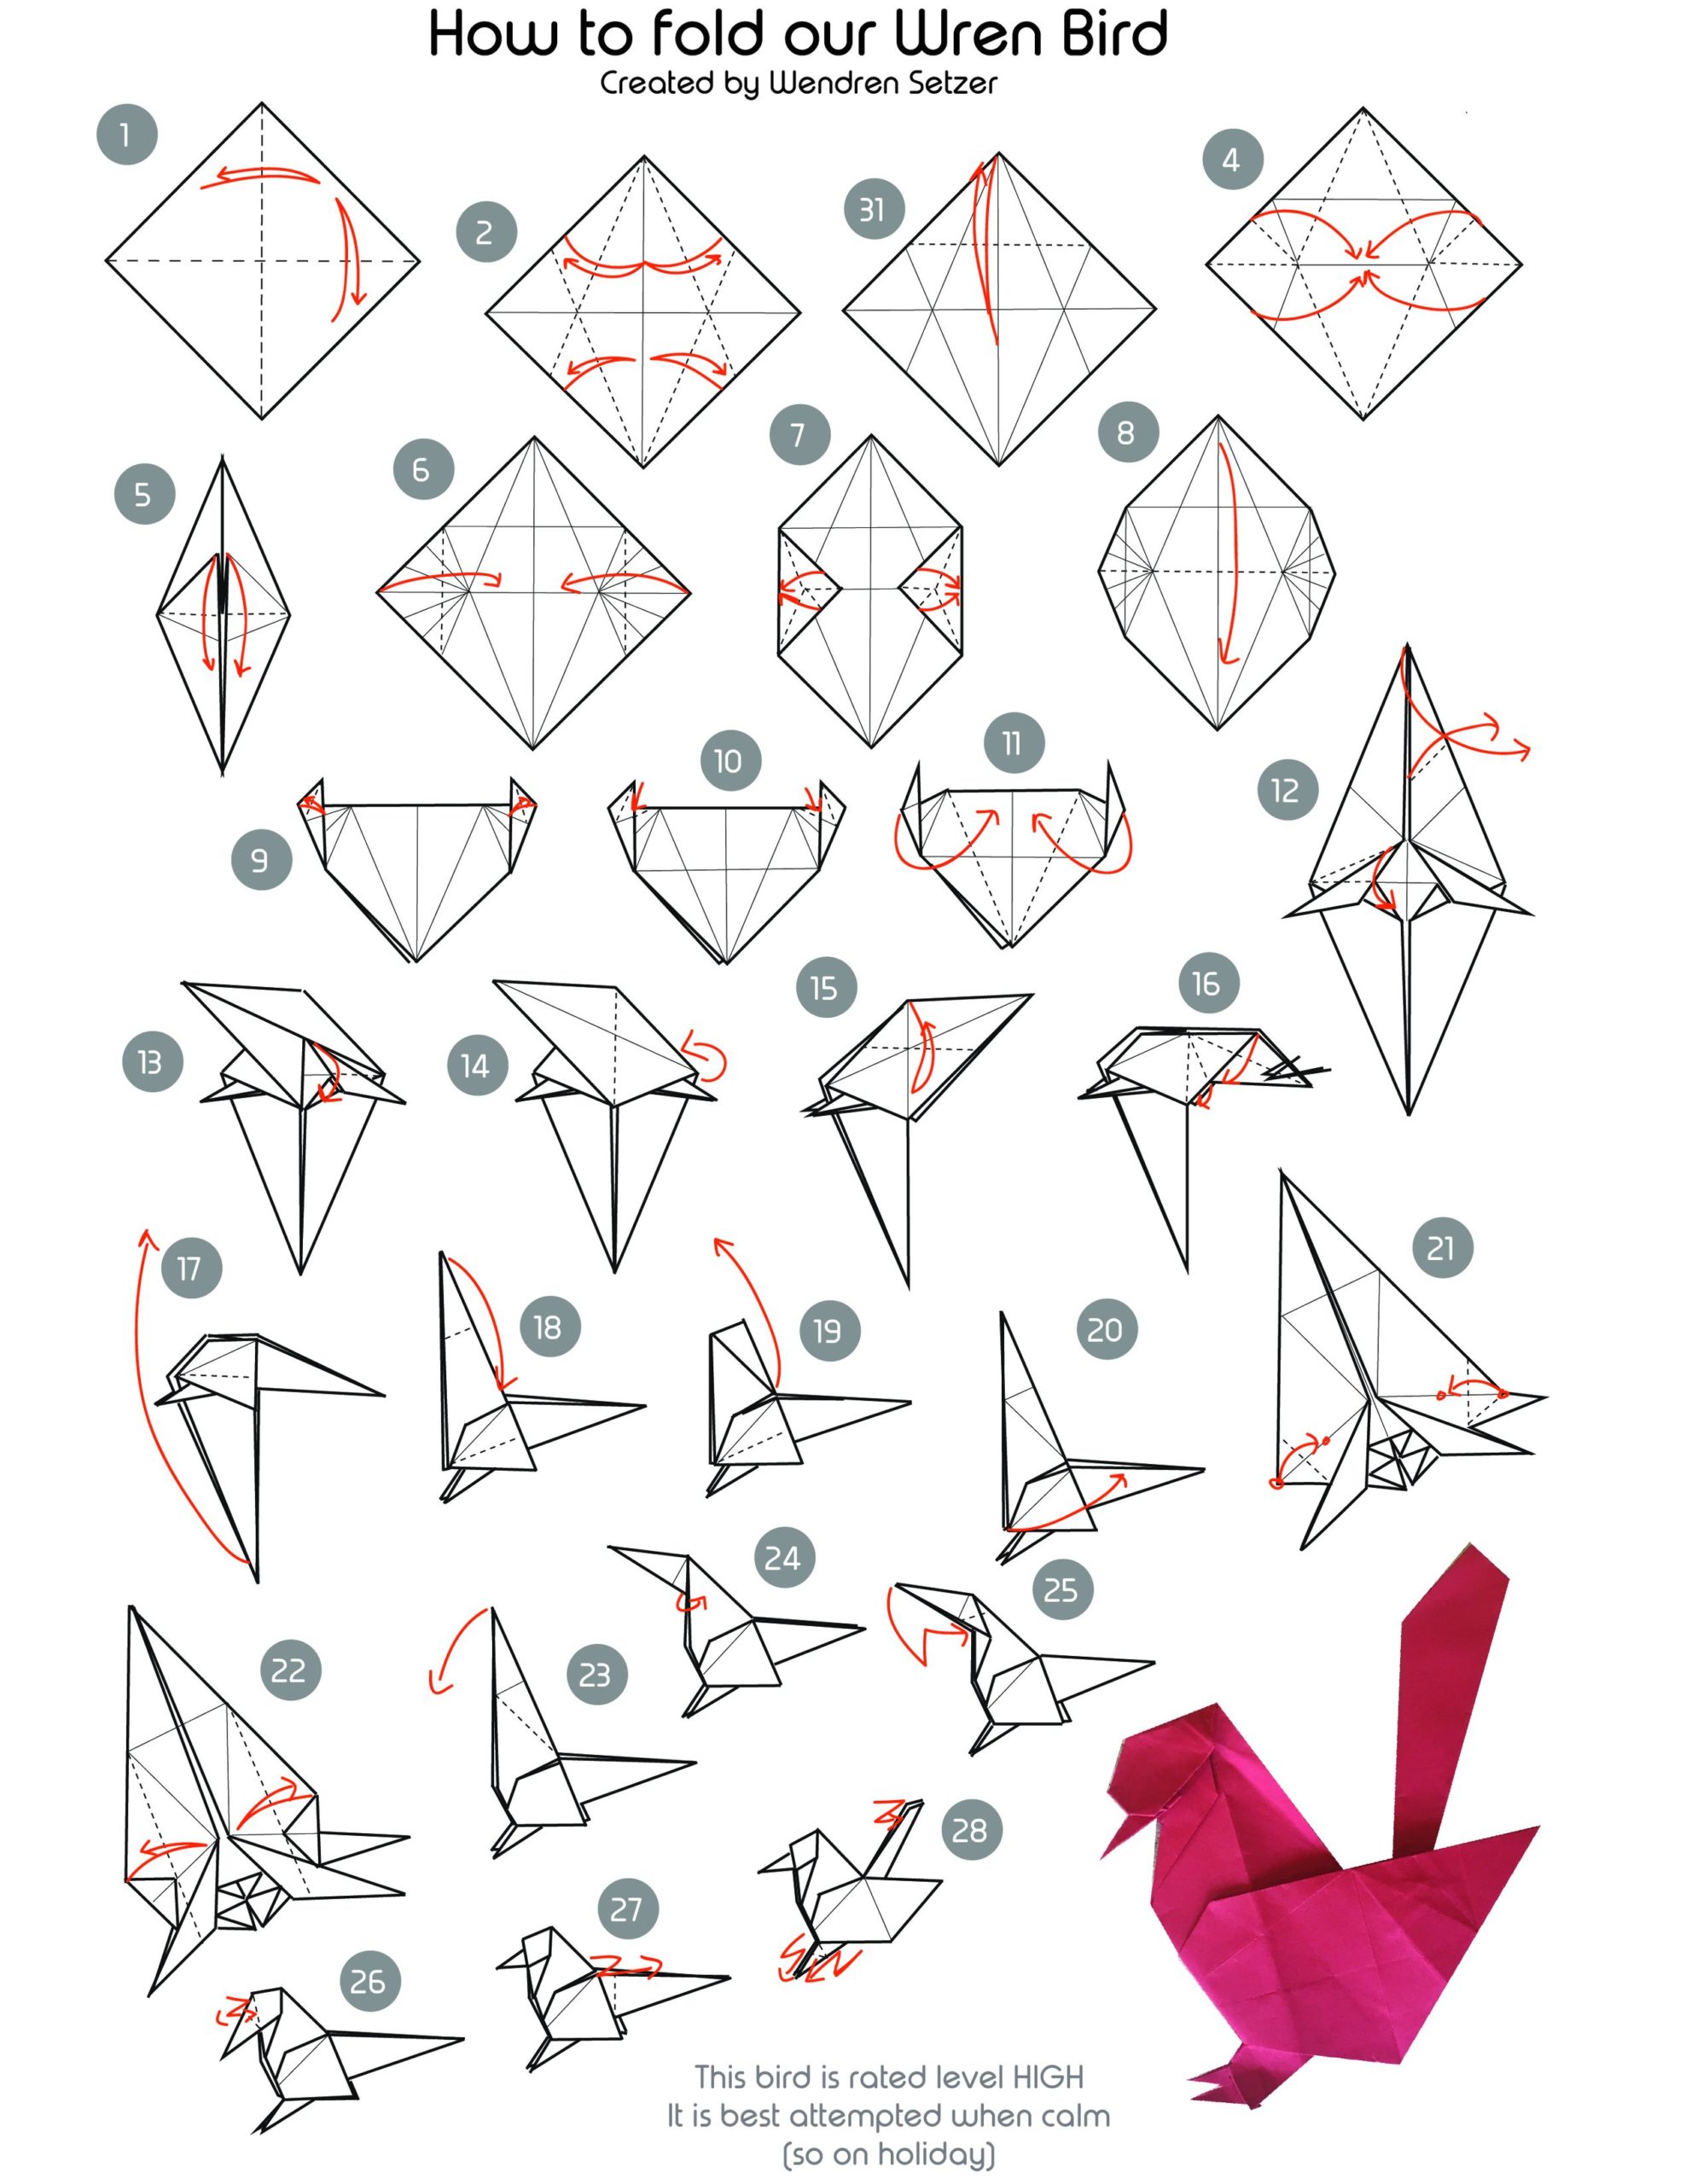
See the below image for the How to make bird origami diagram. Learn how to make origami birds with these easy to follow instructions. Origami birds make great decorations for the home, you can hang them up or give them as gifts for friends and family. Everyone has seen the classic origami crane.
To make origami birds, start by folding a square piece of paper in half vertically, horizontally, and diagonally, unfolding after each fold. Then, fold the top corners to the bottom and press the sides in so the paper is folded up in a small square. Fold the corners in toward the center crease and then unfold.
To make a flying bird using origami, start by making a diagonal crease in a square of origami paper. Then, fold the paper in half diagonally the other way, so you have a triangle with a crease down the center.
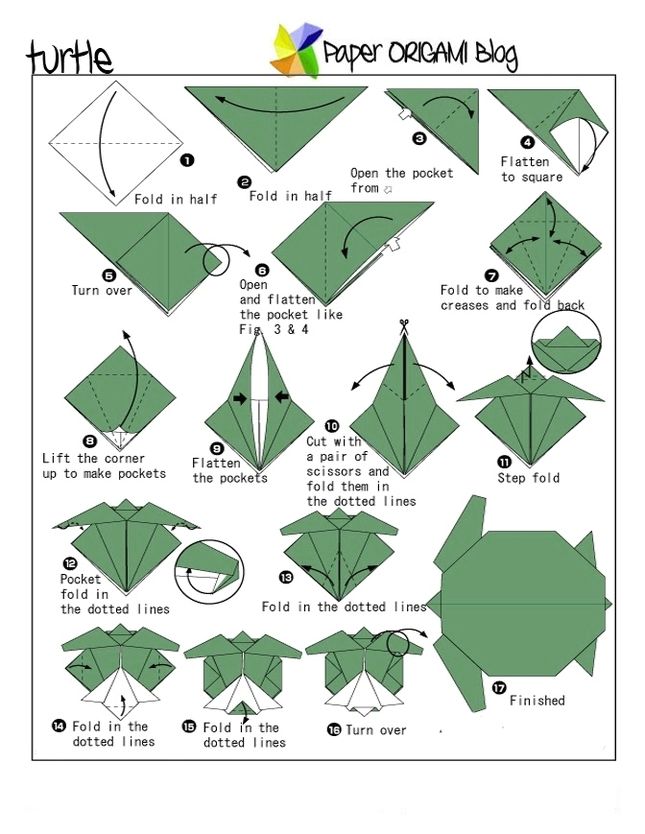
See the below image for the Turtle origami diagram.
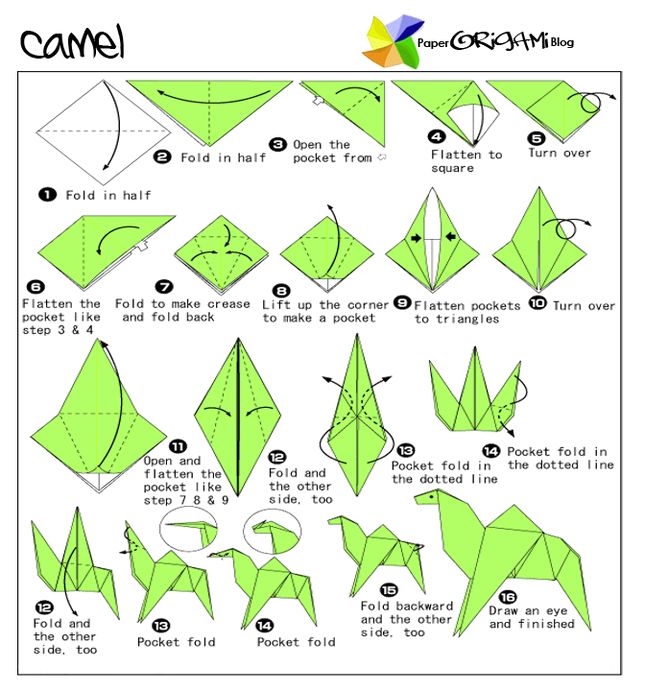
See the below image for the Camel paper origami guide diagram. You’ll be able to fold many origami models in no time. Here is a list of easy origami that anyone can have fun making. Click on the diagram you want and start folding.
Origami is simply the art of folding paper. Oru” in Japanese means ‘to fold’ and Kami” in Japanese means ‘Paper’, so it translates as ‘ To fold paper ‘. Click here to learn more about the origins of origami. All of the origami instructions on this website are easy to understand.
The origami instructions at Origami.guide are presented in an easy to follow photo tutorial format. You will find lots of wonderful origami models to fold at origami.guide, many of which are unique and can’t be found anywhere else! Origami is extremely enjoyable and gives a great sense of accomplishment after folding a model.
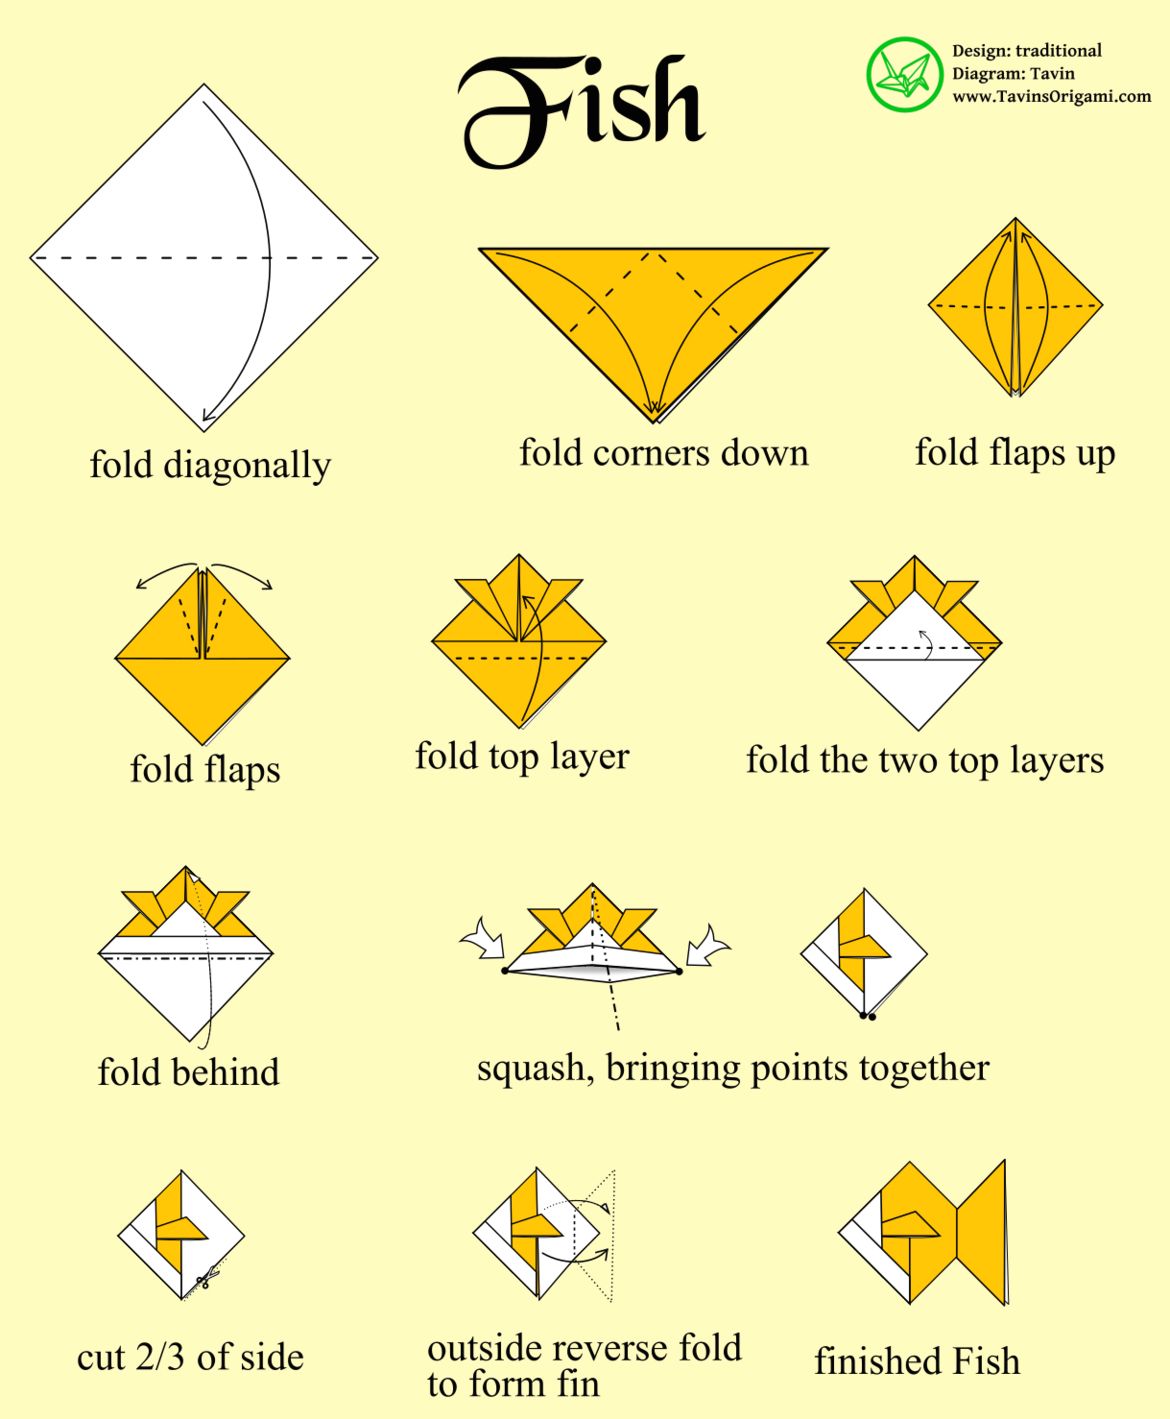
See the below image for the Origami fish instructions diagram. What you need; Square origami paper. Googly Eyes (for the fun of it) Step by Step Easy Origami Fish Tutorial. Start by folding a square piece of paper diagonally (both sides) and in half (one side) – crease and unfold as shown on the first image above. Hold the paper as indicated with blue spots and fold towards the center to get a triangle shape.
This is the front of our origami paper, our origami fish will end up being this colour. 2. This is the back of the origami paper, which is sometimes white. Start this side up.
To make an origami fish, start by creating the base. First, fold a square piece of paper in half both ways, unfolding it after each fold so that the paper has 2 intersecting creases. Then, crease the paper in half diagonally both ways and unfold it until the paper has 4 intersecting creases.
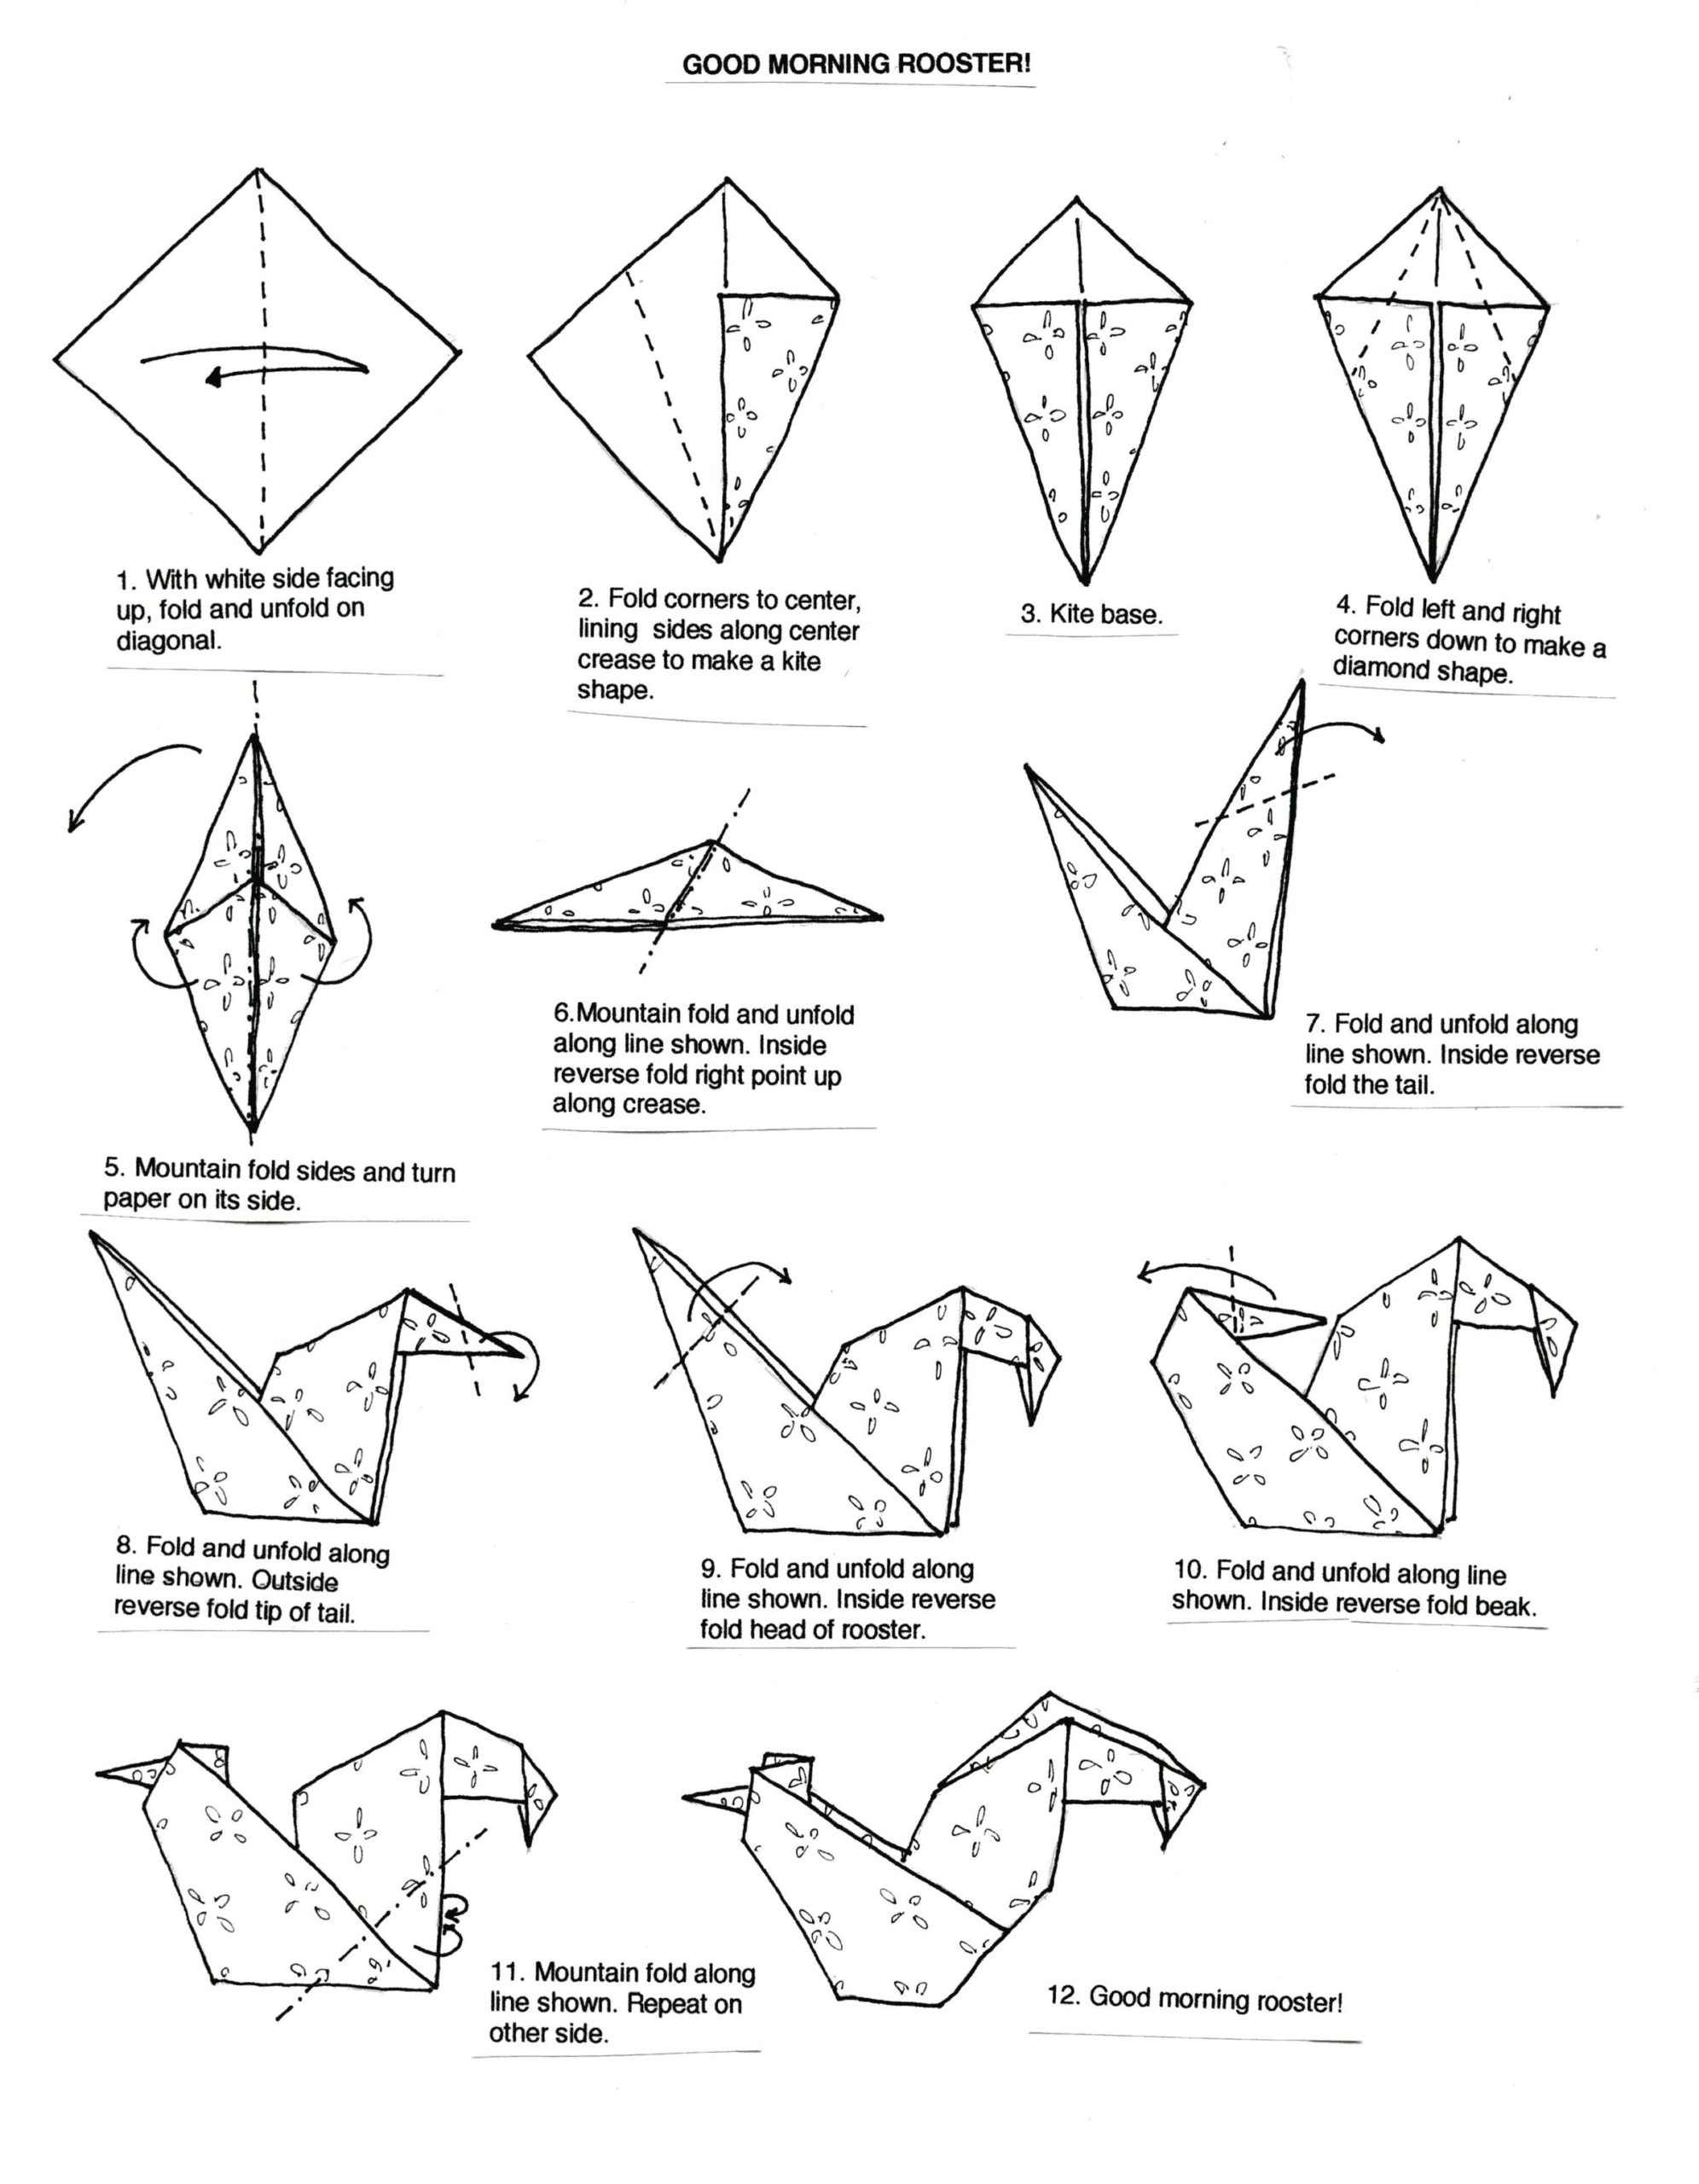
See the below image for the Chicken origami diagram.
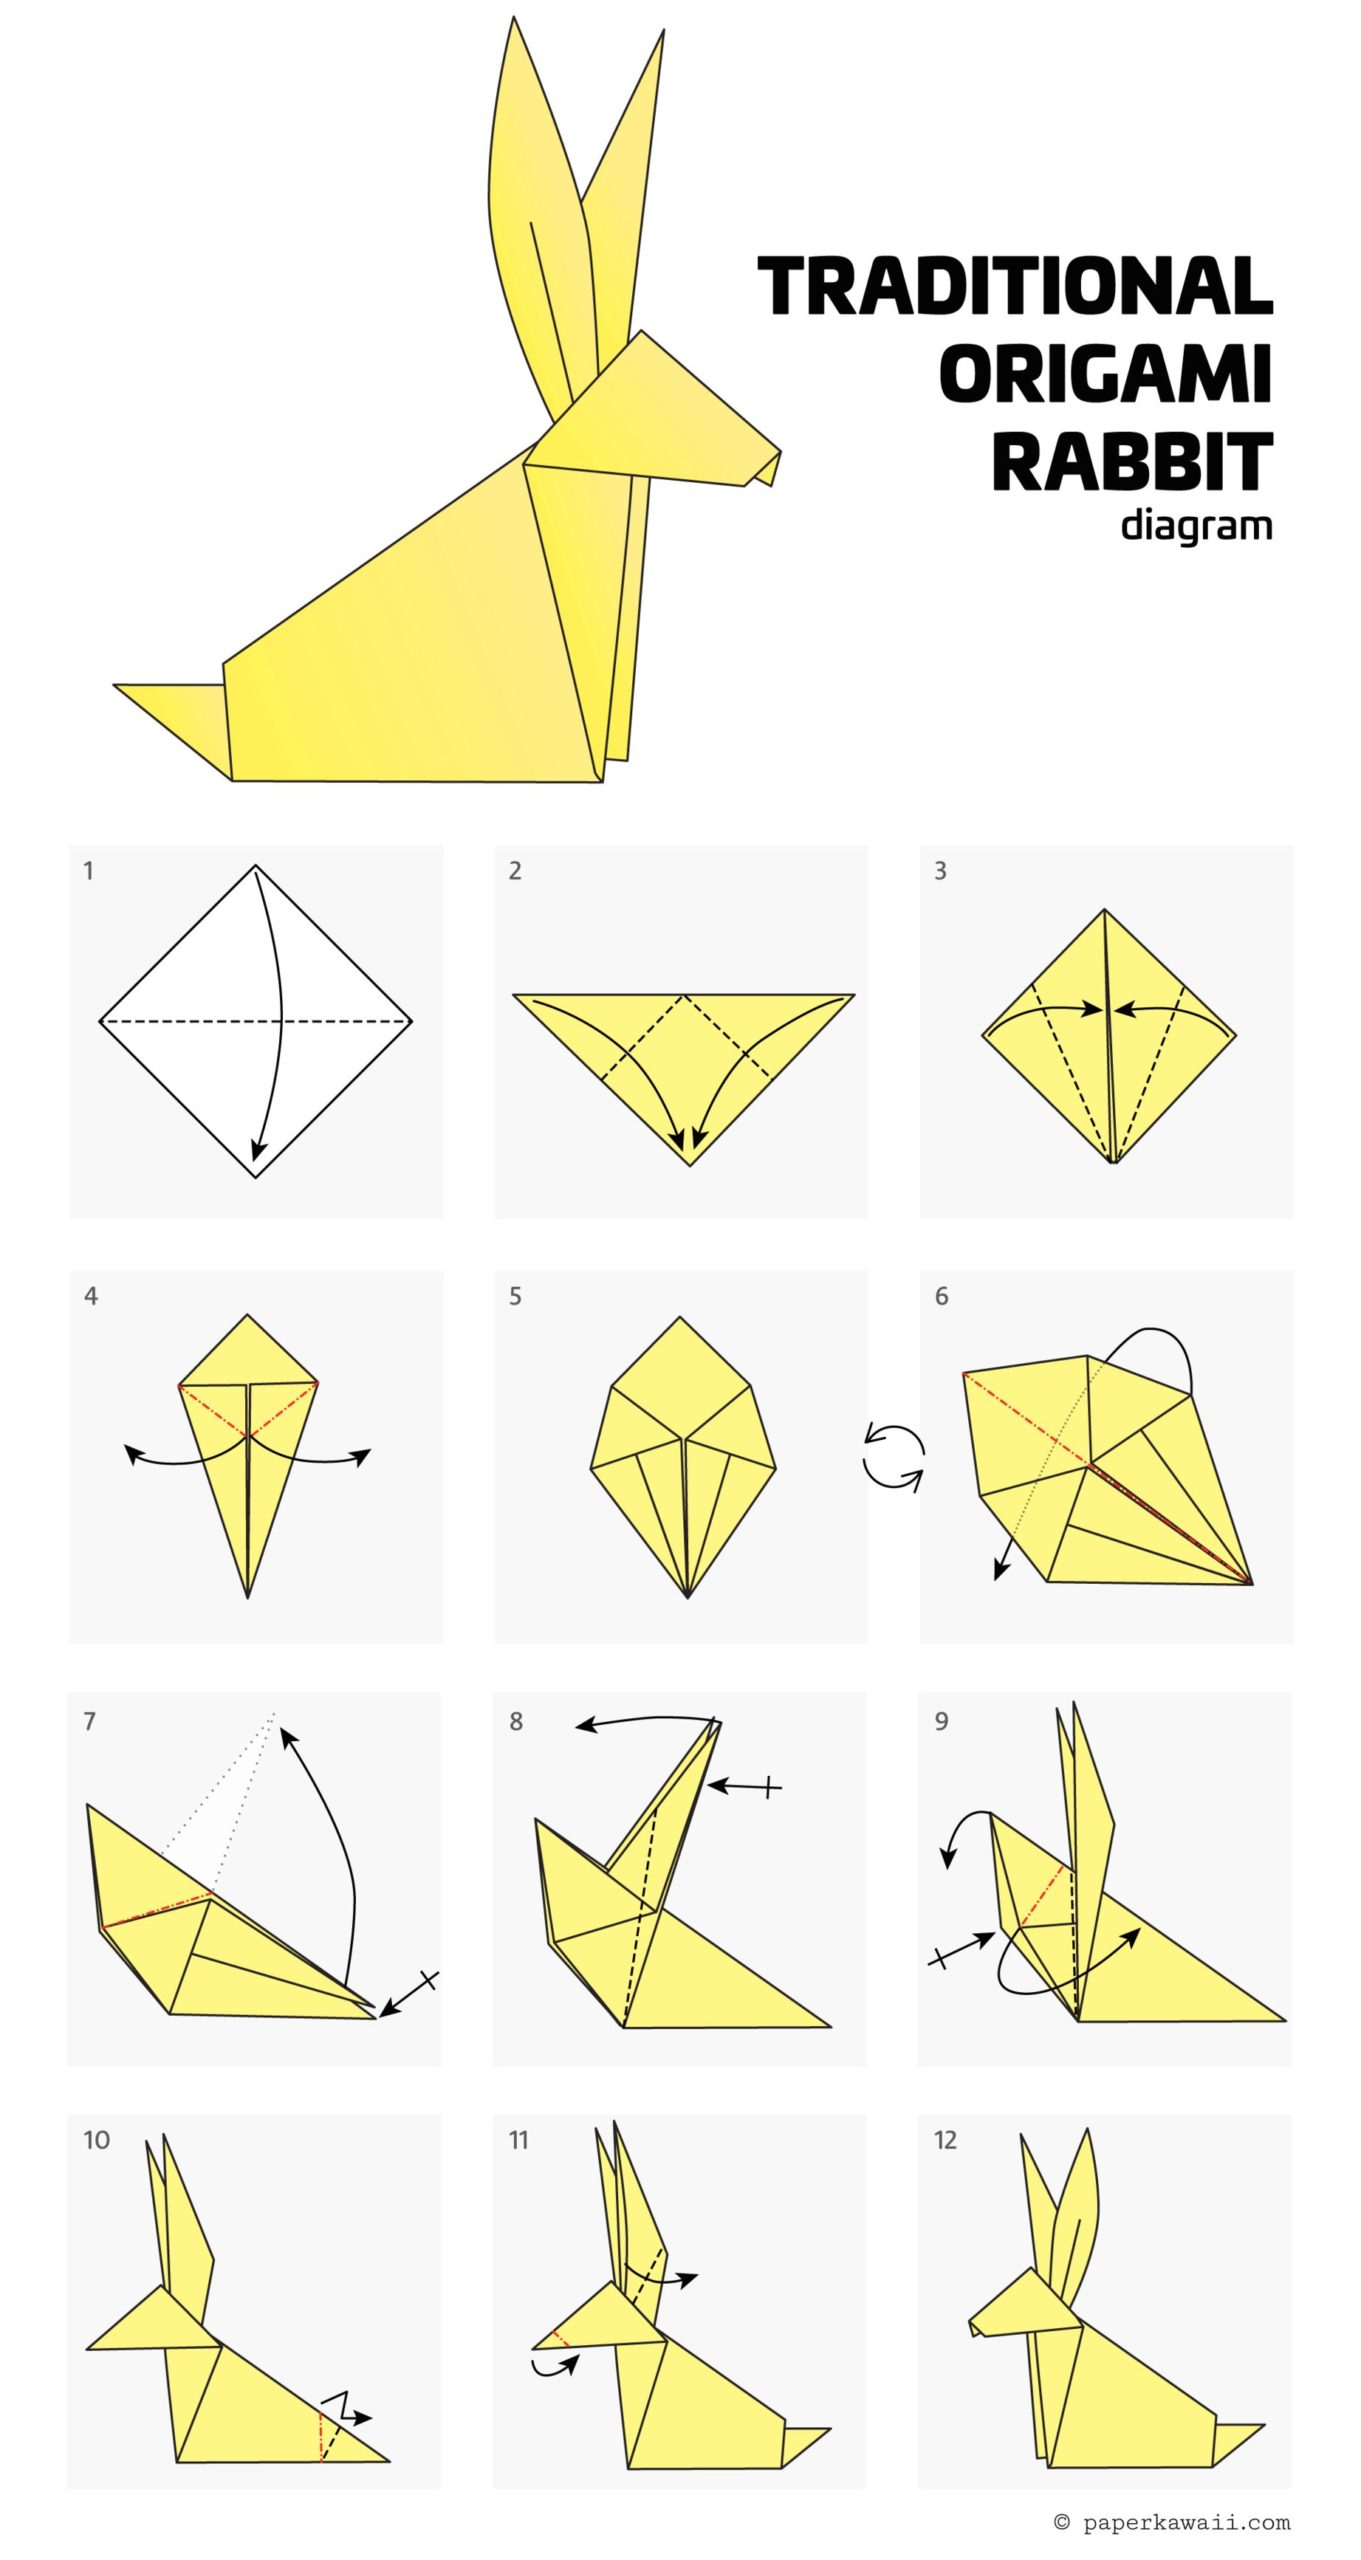
See the below image for the Rabbit Origami diagram. Rabbit Ear Fold. The rabbit ear fold is a common origami technique which collapses the paper and then gives a new flap or ear” at the front.
These instructions will show you how to make an easy origami bunny rabbit folded from a Fish Base. If you’ve never folded anything before we recommend that you check out our Beginner’s Guidefirst. It’ll show you all the basic folds and techniques.
Step 1) Fold the paper in half and unfold it. Step 2) Fold both sides in to the centre along the dotted lines. Step 3) Fold both sides at the bottom in to the centre along the dotted lines. Step 4) Pull out the paper trapped inside and fold it flat into a Rabbit Ear Fold on each side.